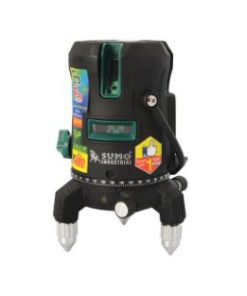
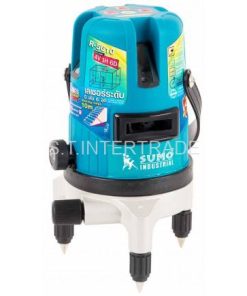
เลเซอร์ระดับแสงสีเขียว 5 เส้น 6 จุด รุ่น GR-5610 SUMO
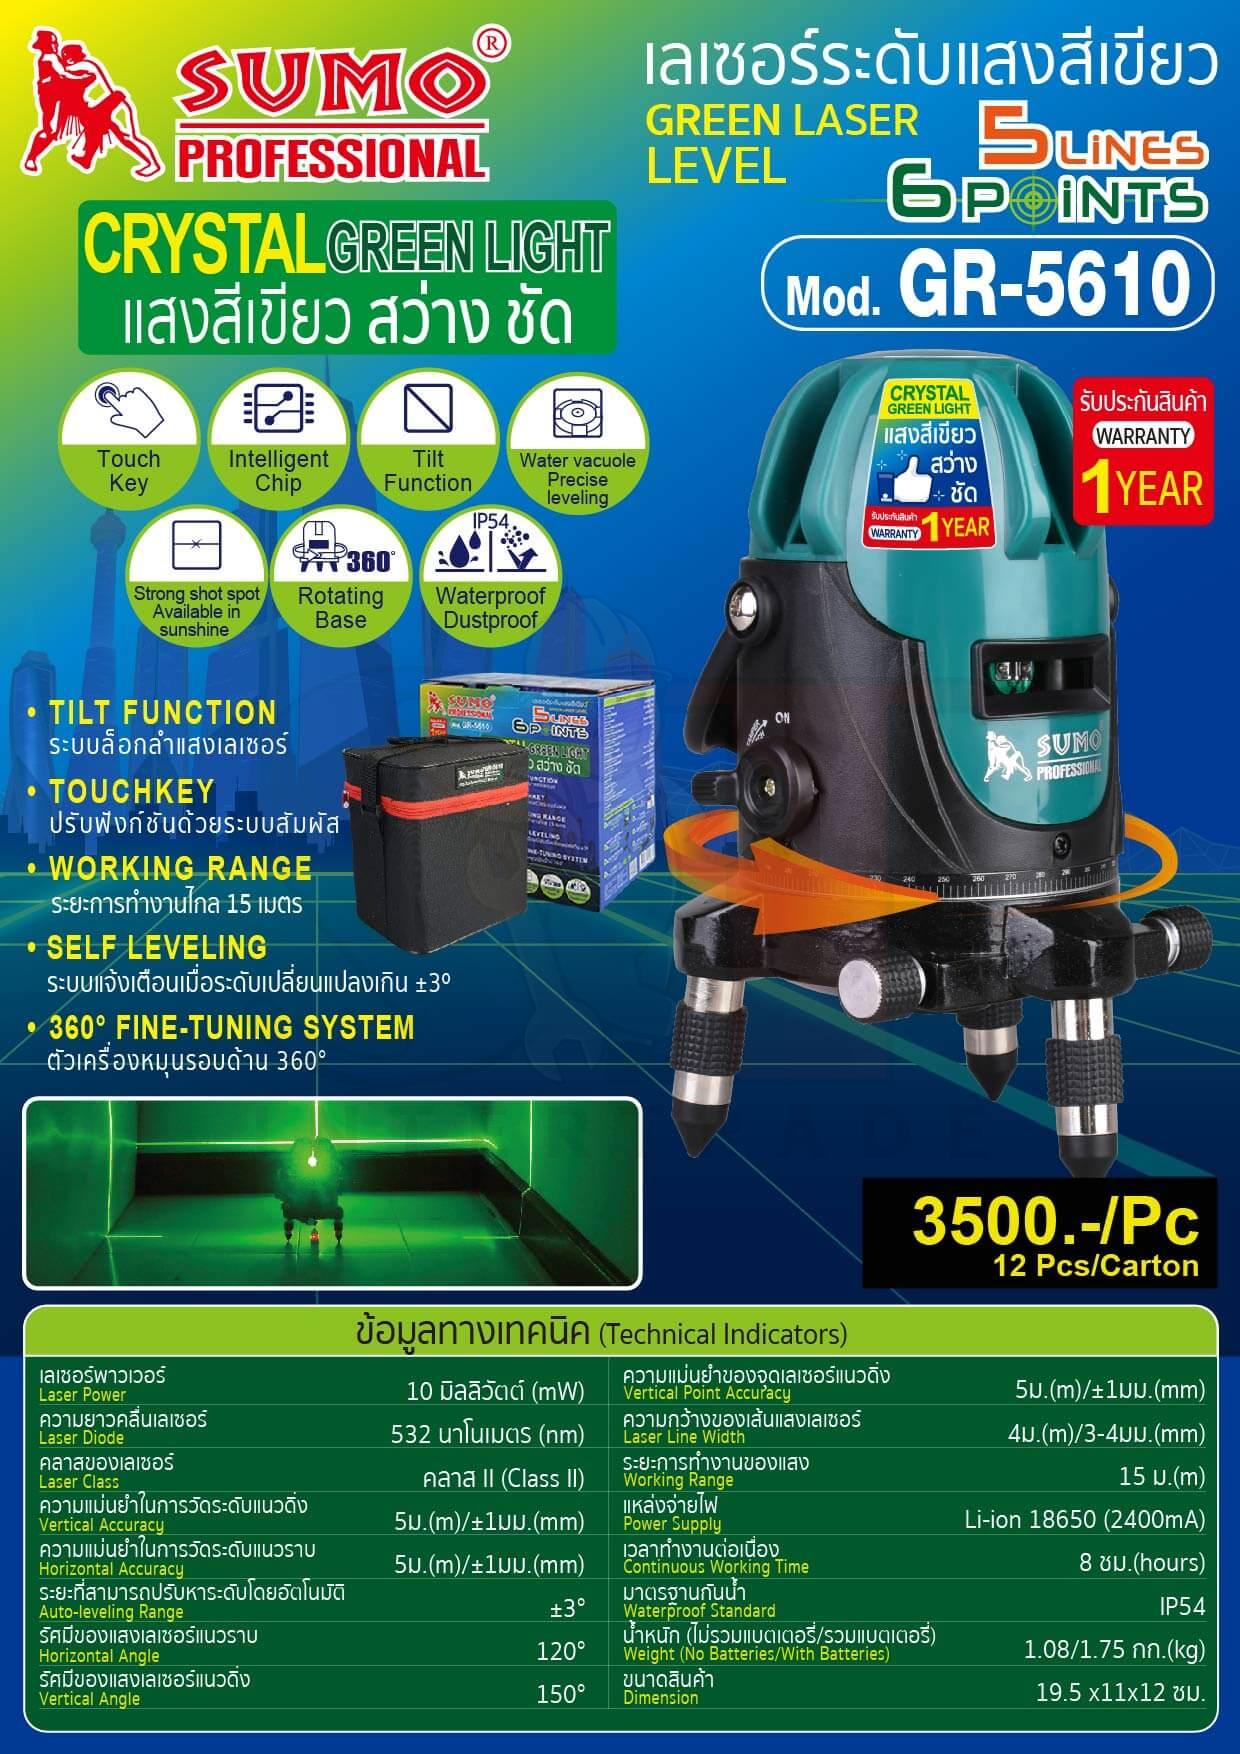
- เครื่องวัดระดับเลเซอร์ มีระบบล็อกลำแสงเลเซอร์ สะดวกในการใช้งานมากขึ้นด้วย
- ระบบแผงควบคุมแบบ Intelligent chip
- ฟังก์ชันทั้งหมดสามารถปรับได้อย่างรวดเร็วโดยใช้ปลายนิ้วสัมผัส
- ระยะการทำงานไกล 15 เมตร
- ระบบแจ้งเตือนเมื่อระดับเลเซอร์เปลี่ยนแปลงเกิน ±3 องศา
- มีระดับน้ำเรืองแสงด้านบนแผงควบคุม มองเห็นได้ง่ายที่มืด
- ตัว เครื่องวัดระดับเลเซอร์ หมุนรอบด้าน 360 องศา

สนใจสอบถามเพิ่มเติม
รายละเอียดเพิ่มเติม
เลเซอร์ระดับแสงสีเขียว 5 เส้น 6 จุด รุ่น GR-5610 SUMO

รายละเอียดสินค้า
เลเซอร์ระดับแสงสีเขียว5 เส้น6 จุด
เลเซอร์แสงสีเขียวสว่าง มองเห็นชัด ในระยะไกล
มีระบบล็อกลำแสงเลเซอร์ สะดวกในการใช้งานมากขึ้นด้วย
ระบบแผงควบคุมแบบIntelligent chip
- ฟังก์ชันทั้งหมดสามารถปรับได้อย่างรวดเร็วโดยใช้ปลายนิ้วสัมผัส
- ระยะการทำงานไกล 15 เมตร
- ระบบแจ้งเตือนเมื่อระดับเลเซอร์เปลี่ยนแปลงเกิน ±3 องศา
- มีระดับน้ำเรืองแสงด้านบนแผงควบคุม มองเห็นได้ง่ายที่มืด
- ตัวเครื่องหมุนรอบด้าน 360 องศา
การใช้งาน (Application)
- เครื่องวัดระดับเลเซอร์ ใช้สำหรับตั้งแนว ทั้งแนวระนาบและแนวดิ่งโดยฉายลำแสงเลเซอร์ในพื้นที่ต่างๆ เหมาะสำหรับใช้ในงานตกแต่งภายใน และวางแนวภายในอาคารหรือในที่ร่ม เช่น งานปูพื้นกระเบื้องผนัง งานติดตั้งฝ้าเพดาน งานประปา งานไฟฟ้า และงานไม้
- The laser level using for setting up the line both horizontal and vertical by shining the laser light in the areas.Moreover, it is suitable for interior, the setting within the building or in the shade areas such as flooring tiles work, setting up the attic ceiling, pipeline system, electronic system and wood work.
ข้อมูลทางเทคนิค (Technical data)
| เลเซอร์เพาเวอร์ | 10 มิลลิวัตต์ |
| ความยาวคลื่นเลเซอร์ | 532 นาโนเมตร |
| คลาสของเลเซอร์ | คลาส II |
| ความแม่นยำในการวัดระดับแนวตั้ง | 5ม./±1มม. |
| ความแม่นยำในการวัดระดับแนวนอน | 5ม/±1มม. |
| ระยะที่สามารถปรับหาระดับโดยอัตโนมัติ | ±3° |
| รัศมีของแสงเลเซอร์แนวนอน | 120° |
| รัศมีของแสงเลเซอร์แนวตั้ง | 150° |
| ความแม่นยำของจุดเลเซอร์แนวดิ่ง | 5ม.±1มม. |
| ความกว้างของเส้นแสงเลเซอร์ | 4ม./3-4มม. |
| ระยะการทำงานของแสง | 15 เมตร |
| แหล่งจ่ายไฟ | ลิเธียมไอออน 18650 2400mA |
| เวลาทำงานต่อเนื่อง | 8 ชม. |
| มาตรฐานกันน้ำ | IP54 |
| น้ำหนัก (ไม่รวมแบตเตอรี่/รวมแบตเตอรี่) | 1.08/1.75 ก.ก. |
คุณสมบัติ (Feature)
- เครื่องวัดระดับเลเซอร์ เลเซอร์แสงสีเขียว ส่องสว่าง มองเห็นชัดในระยะไกล
- มีเลเซอร์ 5 เส้น พร้อมจุด (เส้นแนวดิ่ง 4 เส้น, เส้นแนวราบ 1 เส้น, 5 จุด และ 1 จุดด้านใต้เครื่อง)
- มีเลเซอร์ 1 จุดที่เส้นแนวราบด้านหน้า 1 จุดที่เส้นแนวดิ่งด้านหน้าและหลัง 1 จุดที่เส้นแนวดิ่งด้านซ้ายและขวา
- ระบบแผงควบคุมด้วย Intelligent chip ฟังก์ชันทั้งหมดสามารถปรับได้อย่างรวดเร็วโดยใช้ปลายนิ้วสัมผัส ง่ายและสะดวกต่อการใช้งาน
- สามารถกดเปลี่ยนแสงเลเซอร์ ระหว่างเส้นแนวราบ หรือเส้นแนวดิ่งหรือทั้งสองเส้น เส้นแนวดิ่งตัดผ่านเพดานเป็นมุม 90 องศา
- มีระบบล็อกแสงเลเซอร์สำหรับตั้งเอียงองศา
- มีระบบแจ้งเตือนเมื่อระดับเลเซอร์เปลี่ยนแปลงเกิน ±3 องศา โดยแสงเลเซอร์จะกระพริบและมีเสียงดังเตือนต่อเนื่อง
- หมุนตัวเครื่องได้ 360 องศา และสามารถหมุนปรับแบบละเอียดโดยหมุนปรับองศาที่ฐานเครื่อง เพื่อให้ความแม่นยำยิ่งขึ้น
- 532 Crystal green light laser, brightness, can see the beam laser clearly for long distance.
- The output of 5 Lines 6 Points (4 Vertical, 1 Horizontal, 5 Enhanced Points, 1 Down Point).
- There is one horizontal laser point on front, one vertical laser points on front and back and one vertical laser points on left and right side.
- Easy operation mode is touch single control function. With smart control chip, it is very easy to operate this instrument. All functions can be activated just by touching the keypads.
- The laser can be changed between horizontal and vertical lines, and cross free. 4 vertical lines covering the ceiling, walls, and floor, effectively separate the room. Vertical lines cross at 90° angles in the ceiling, forming the reference points enables to divide surfaces at a right angle.
- It has “Tilt mode”can make tilt lines based on your different purposes.
- The laser beam will blink fast when the tool is beyond self-leveling range (±3°).
- The laser level can move 360° rotary base and fine-tuning can change the degree thoroughly in order to make it accuracy.
แผงควบคุม (Operation panel display)
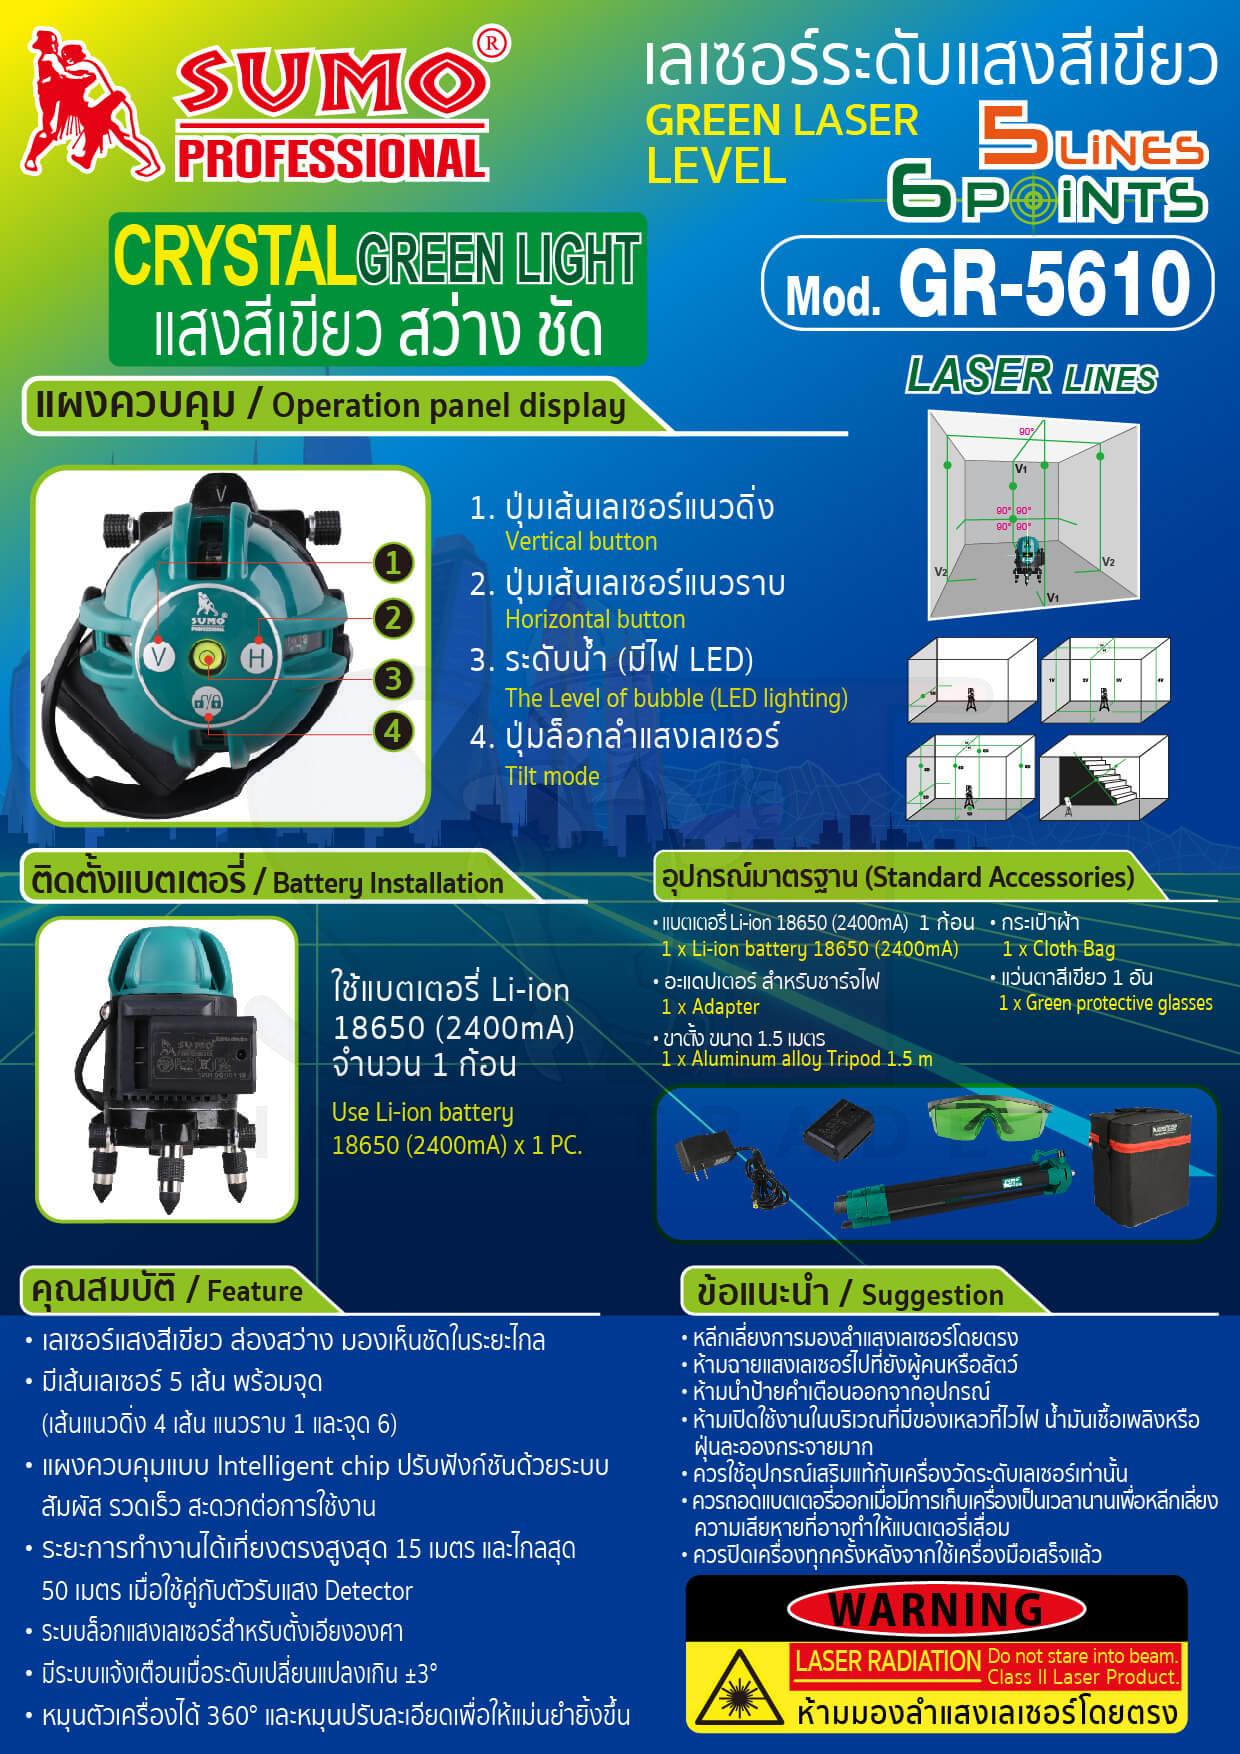
- ปุ่มเส้นเลเซอร์แนวดิ่ง (V)
- ปุ่มเส้นเลเซอร์แนวราบ (H)
- ระดับน้ำ (มีไฟ LED)
- ปุ่มล็อกลำแสงเลเซอร์
- Vertical button (V)
- Horizontal button (H)
- Balance Reference Bubble Level (LED lighting)
- Tilt mode
ติดตั้งแบตเตอรี่ (Battery Installation)
- ใช้แบตเตอรี่ Li-ion 18650 (2400mA) จำนวน 1 ก้อน
- Use Li-ion battery 18650 (2400mA) quantity x 1 PC.
วิธีชาร์จแบตเตอรี่ (How to recharge battery)
- ถอดแบตเตอรี่ออกจากตัวเครื่อง
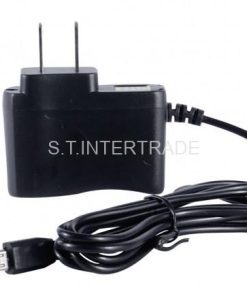
- นำอะแดปเตอร์ต่อกับแบตเตอรี่ Li-ion 18650 และเสียบเข้ากับปลั๊กไฟ หลังจากนั้นอะแดปเตอร์จะแสดงสถานะไฟสีแดงขึ้นมา
- ใช้ระยะเวลาชาร์จแบตเตอรี่ประมาณ 2-3 ชั่วโมง หากแบตเตอรี่เต็มแล้ว จะเปลี่ยนสถานะไฟเป็นสีเขียว
- Remove the battery from device
- Connect the adapter to Li-ion 18650 battery and plug. After that, the adapter will show a red light status.
- It takes about 2-3 hours to recharge the battery. If the battery is full, adapter will change the light status to green.
วิธีการใช้งาน
1. ใส่แบตเตอรี่ Li-ion 18650 ที่ด้านหลังของตัวเครื่อง
2. หมุนปุ่ม ON ที่ด้านข้างของตัวเครื่อง รอ 3 วินาที เครื่องจะเปิดการใช้งาน
3. หลังจากเครื่องเปิดการใช้งาน จะมีลำแสงเลเซอร์แนวนอนสีเขียวติดขึ้นมาที่ด้านหน้า พร้อมจุดสีแดงด้านใต้ตัวเครื่อง หมายความว่าพร้อมใช้งานทันที
4. กดปุ่ม V หรือ H เพื่อเลือกโหมดใช้งานตามที่ต้องการ
4.1 ปุ่ม V คือ ระบบการทำงานแสงเลเซอร์ในแนวดิ่ง
กดครั้งที่ 1 เส้นออกแนวดิ่ง 1 เส้นที่ด้านหน้า
กดครั้งที่ 2 เส้นออกแนวดิ่ง 1 เส้นที่ด้านขวา
กดครั้งที่ 3 เส้นออกแนวดิ่ง 2 เส้นที่ด้านซ้ายและด้านหลัง
กดครั้งที่ 4 ปิดการใช้งานเส้นแนวดิ่ง
4.2 ปุ่ม H คือ ระบบการทำงานแสงในแนวราบ
กดครั้งที่ 1 เส้นออกแนวราบ 1 เส้น
กดครั้งที่ 2 ปิดการใช้งานเส้นแนวราบ
5. หากเครื่องวัดระดับเลเซอร์มีการเปลี่ยนแปลงเกิน ±3 องศา ให้ปรับขาตั้งโดยให้ฟองอากาศของระดับน้ำอยู่ตรงกลางของวงกลม เมื่อแน่ใจว่าไม่มีเสียงเตือนแล้ว เครื่องวัดระดับเลเซอร์จะทำงานโดยอัตโนมัติ
6. หากต้องการเปิดใช้ระบบล็อกลำแสงเลเซอร์เพื่อตั้งเอียงวัดองศา ให้กดปุ่ม Tilt mode ค้างไว้ 4 วินาที
How to use
1. Put the power supply with Li-ion 18650 battery.
2. Turn on the switch from OFF to ON on the side of machine. Wait 3 seconds, and then the machine will work automatically.
3. After open the machine, will have a green horizontal laser beam on front and red dot under the machine.
4. Press the V or H (V-vertical, H-horizontal) button to select the work mode to be satisfied with the working requests.
4.1 “V” button is vertical.
First round, vertical line at the front.
Second round, vertical line at the right side.
Third round, vertical line at the left and back side.
Last round, closing the machine.
4.2 “H” button is horizontal.
First round, horizontal line at the front.
Last round, closing the machine.
5. If self-leveing range over than ±3°, should adjust the 5/8 tripod threaded hole and make the bubble into black circle. when you make sure the machine is not alert then can work automatically.
6. If you want to set the tilt function for lock the laser beam. Press “….” for 4 seconds, the laser level can make tilt lines base on your different purposes.
อุปกรณ์มาตรฐาน (Standard Accessories)
- เลเซอร์ระดับ รุ่น GR-5610
- แบตเตอรี่ Li-ion 18650 (2400mA) แบบชาร์จได้ 1 ก้อน
- อะแดปเตอร์ สำหรับชาร์จไฟ
- แว่นตาสีเขียว 1 อัน
- คู่มือและใบรับประกัน
- กระเป๋าผ้าสำหรับใส่เครื่องเลเซอร์
- ขาตั้ง ขนาด 1.5 เมตร
- 1 x The machine mod. GR-5610
- 1 x Li-ion battery 18650 (2400mA)
- 1 x Adapter
- 1 x Green protective glasses
- 1 x Manual
- 1 x Warranty
- 1 x Cloth bag
- 1 x Aluminum alloy Tripod 1.5 m
ข้อแนะนำ (Suggestion)
- ควรอ่านคู่มือก่อนการใช้งาน
- ควรจัดเก็บในพื้นที่แห้งและสะอาด
- ควรหลีกเลี่ยงการสั่นสะเทือน,การแกว่ง และพื้นที่ความร้อนสูง
- ควรปิดเครื่องทุกครั้งหลังใช้งานเสร็จแล้ว
- Please read the manual before using the machine.
- After using the machine should clean and keep the machine dry.
- ALWAYS avoid shock, vibrations, and extreme heat.
- Always turn off the machine after, finished the work.
คำเตือน / Warning
- หลีกเลี่ยงการมองลำแสงเลเซอร์โดยตรง
- ห้ามทำตก กระแทก หรือเขย่าตัวเครื่อง เพื่อหลีกเลี่ยงการเปลี่ยนแปลงโครงสร้างความแม่นยำของเลเซอร์
- ห้ามนำป้ายคำเตือนออก
- ห้ามใช้งานในพื้นที่ที่มีผิวสะท้อน อาจทำให้ลำแสงเซอร์สะท้อนเข้าตาผู้ใช้งานหรือผู้อื่นได้
- ควรถอดแบตเตอรี่ออกเมื่อมีการจัดเก็บเครื่องมือเป็นเวลานาน เพื่อหลีกเลี่ยงความเสียหายที่อาจทำให้แบตเตอรี่เสื่อม
- Avoid direct exposure of the laser beam to the eyes.
- DO NOT drop, knock or shake the instrument to avoid changing precision.
- DO NOT remove warning labels.
- DO NOT operate on or near a reflective surface, as the beam could be reflected into your eyes or the eyes of others.
- REMOVE the batteries when storing the machine for an extended period of time to avoid potential damage to unit if batteries leak.
